Let’s Go Aero Brings a Second Level Revolution to Trucks with Nelson™ Line of VRacks™
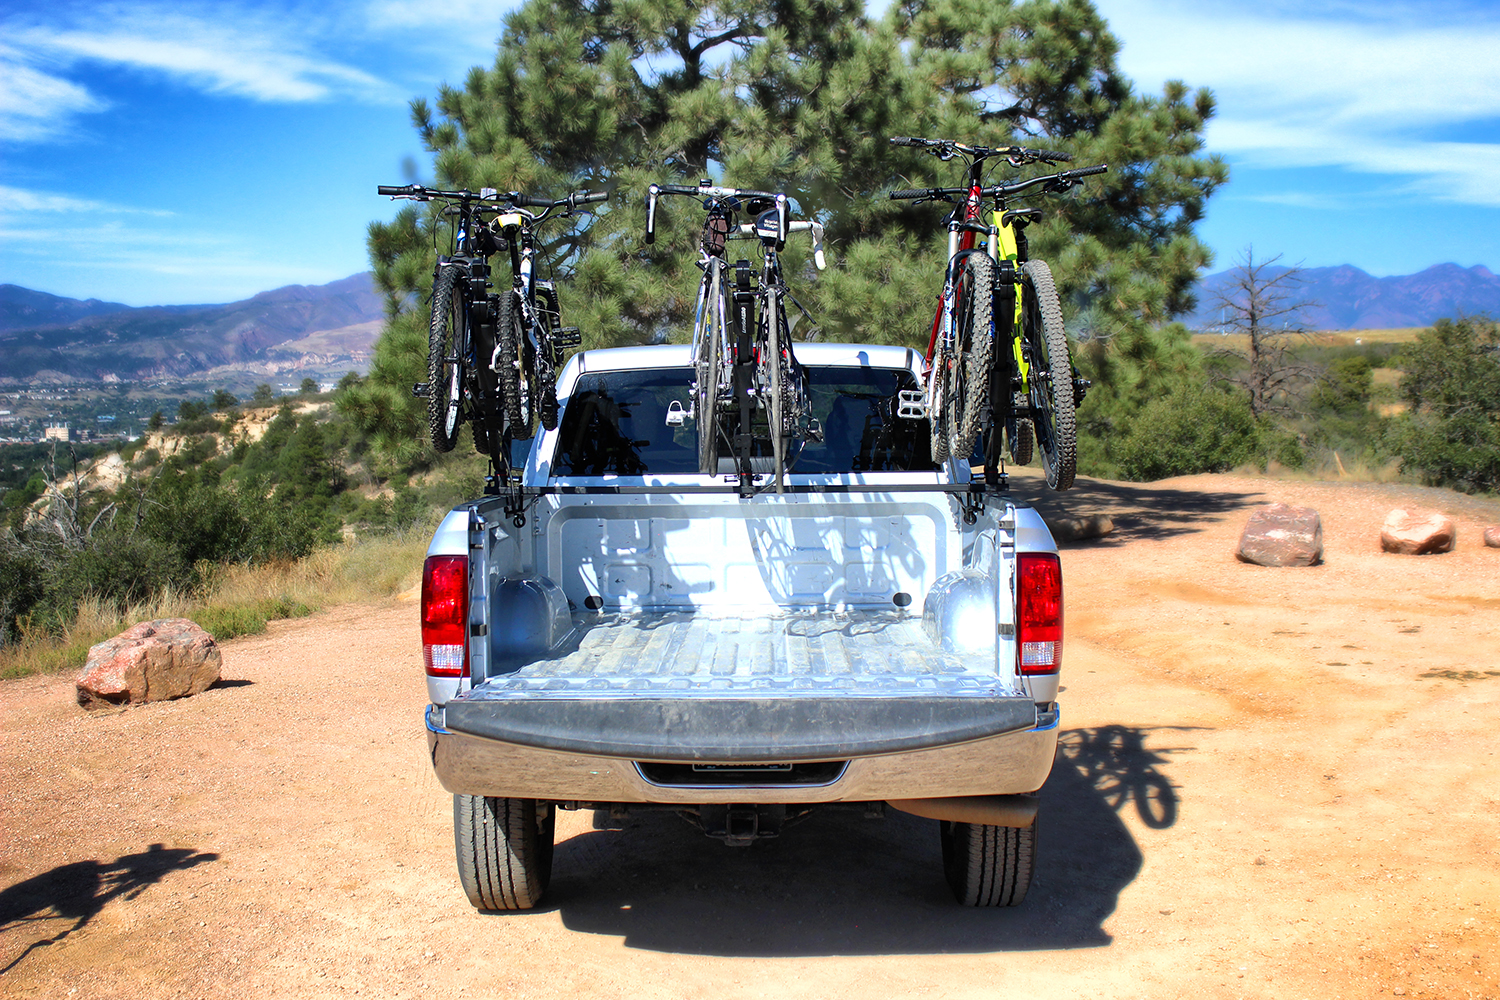
The Nelsons™ are an all-new bicycle and multi-sport carrier product line for pick up truck beds. Utilizing Let’s Go Aero’s leading VRack™ technology, the Nelsons take bicycles and gear storage, transport, and organization to the second level, leaving the inside of the truck bed fully open for other cargo.
The Nelson family includes four models to accommodate varying truck bed configurations including the Full Nelson™, Half Nelson™, and Three-Quarter Nelson™.
Universal to all models is two bike carrying capacity using the modular and removable SpinWing™. The SpinWing turns 360 degrees for easy loading access from the ground or interior of the bed. A four-point adjustable wheel grip system provides Zero-G™ stability of each bicycle, while the adjustable Wings accommodate all bike sizes and frame styles. An all-new anti-theft RingLocker™ security system is included to lock bikes to the Nelson and separately, the Nelson carrier to the truck bed.
All Nelson models ship ready to carry two bikes. The Three-Quarter and the Full Nelson include two additional V-Wing attachment sockets to carry up to six bicycles using the optional SpinWing™ accessory.
“LGA works to do more with less, and the Nelson product line exemplifies this ethic clearly. Nelson and our new related products carry outdoor lifestyle equipment and tools in space that has always existed, but was unused, until the Nelsons” states Marty Williams, co-founder and CEO of Let’s Go Aero and Nelson inventor.
Let’s Go Aero will showcase the Nelsons and other products at the SEMA show in Las Vegas, NV from October 30 through November 2 in booth 37219.
Let’s Go Aero is an innovative Colorado based outdoor lifestyle products company focused on inventing new choices for low impact living in the outdoors and life on the road. Let’s Go Aero has been inventing new solutions for the automotive and outdoor lifestyles since its founding by Sara and Marty Williams in 1998. Let’s Go Aero has been recognized in the automotive and RV markets for its award-winning patented designs and technologies including the Silent Hitch Pin®, TwinTube™, VRack™, Jack-IT®, and other innovations.
For additional information about Let’s Go Aero and its products, contact company headquarters at 719-630-3800 and via LetsGoAero.com.